
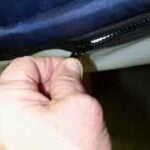
Quick answer: To replace a bad air bladder (also called a cell) in an alternating pressure and low air loss mattress, unzip the mattress cover, unsnap the failed bladder from both sides of the base, and pull its tube or tubes off the connector — noting which tube went where. Then set the new bladder into the vinyl holders, slide the tubes back onto the same connectors, snap both sides down, and zip the cover closed. The whole job takes about 15 minutes and needs no tools beyond a utility knife, and only then if a stubborn tube won't slide off.
Here's how these mattresses fail: not all at once. You don't wake up to a flat mattress on the floor. Instead one cell goes soft, the pump starts running longer and louder trying to keep up, and the person lying on it slowly sinks into one spot that never quite fills back in. For a mattress whose entire job is keeping pressure off skin, a single dead bladder is a real problem.
The good news is you don't replace the whole mattress. These systems are built to be repaired one cell at a time, and swapping a bladder is genuinely one of the easier fixes in this whole category. No adhesives, no special tools, no calling anybody. If you can work a zipper and a snap, you can do this.
What you'll need
- The correct replacement air bladder for your system — match it to your mattress model number, not just "8-inch" or "looks the same"
- A utility knife or box cutter — only if a tube is stuck and needs slicing off
- About 15 minutes
- Optional: a strip of tape or a marker to label tubes before you disconnect anything
Real talk: The single most common mistake here is ordering the wrong bladder. A vented cell with laser holes (the low-air-loss ones) is not interchangeable with a plain non-vented cell, even if they're the same size. Find your system's model number — it's usually on the pump or a tag on the mattress — before you order. On our Med-Aire system, for example, the vented cells and the plain cells are two different part numbers.
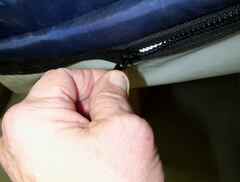
Step 1: Unzip the cover to expose the cells
Run the zipper all the way around and fold the top cover back so you can see the row of individual air bladders sitting in their base. Take a second here to spot which cell is the bad one — it's usually the one that stays soft while its neighbors are firm.
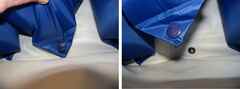
Step 2: Unsnap the bladder on the side away from the tubes
Each bladder snaps to the base on both ends. Start with the end that does not have any tubes connected to it — it's the easier side and gets the cell loose without fighting the tubing. Pop that snap free.
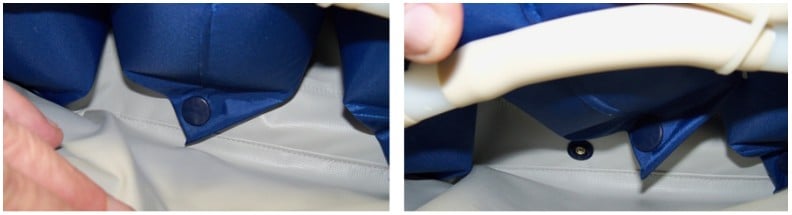
Step 3: Unsnap the bladder on the tube side
Now unsnap the other end — the side where the tube or tubes connect. The bladder is now free from the base but still attached to the air supply by its tubing, which you'll deal with next.
Step 4: Remove the tubes from the connector
Pull the bladder's tube or tubes off the connector. If a tube is stuck on tight, you can slice the very end of it with a utility knife to free it — just go slow and be careful not to nick any of the good tubes around it. If your bladder has more than one tube, note which tube went to which connector before you pull them.

Pro tip: Before you disconnect a multi-tube bladder, put a piece of tape on each tube and its matching connector. Ninety seconds of labeling saves you the guessing game later, and getting the tubes back on the right connectors is the one part of this job that actually matters for how the cell inflates.
Step 5: Set the new bladder in and connect the tubes
Pull the old bladder out and set the new one into the vinyl holders where the old one sat. Slide the tube or tubes onto the connector. If there's more than one tube, connect them exactly the way they came off — same tube, same connector.
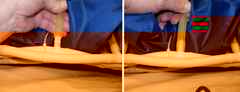
Step 6: Snap both sides of the new bladder to the base
Snap the new bladder down onto the base at both ends, the same two snaps you released earlier. Give it a gentle tug to make sure both ends are seated and the cell is sitting flat in line with its neighbors.
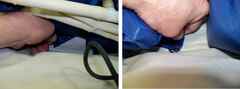
Step 7: Zip the cover back on
Fold the top cover back over the cells and zip it closed all the way around. Turn the pump back on and give it a few minutes to bring the system up to pressure — you should feel the repaired cell firm up and alternate right along with the rest. That's the whole job.
If more than one cell is failing, or the mattress is old enough that you're eyeing a second and third bladder, it may be worth pricing out a full alternating pressure mattress system against the cost of piecemeal repairs. One bladder is an easy call. Five is a conversation.
Frequently Asked Questions
What is an air bladder in a low air loss mattress?
An air bladder, also called a cell, is one of the individual inflatable tubes that make up the surface of an alternating pressure mattress. The pump inflates and deflates them in a cycle to shift pressure off the skin. Low-air-loss systems use vented bladders with tiny laser holes that let a small amount of air escape to keep the skin cool and dry.
How do I know which air bladder to order?
Match the replacement bladder to your mattress system's model number, which is printed on the pump or on a tag sewn to the mattress. Size alone isn't enough — vented (laser-hole) cells and non-vented cells are different parts even at the same length. Our medical air mattress parts section lists bladders by the system they fit.
Do I need any tools to replace an air bladder?
No. The bladder snaps to the base and the tubes push onto the connectors by hand. The only tool you might reach for is a utility knife, and only if a tube is stuck on so tight it needs its end sliced off — in which case cut carefully so you don't damage the neighboring tubes.
How long does it take to replace one bladder?
About 15 minutes for a single cell once you have the right replacement in hand. Most of that is unzipping the cover and getting the tubes back on the correct connectors. The snapping and zipping is quick.
My whole mattress feels soft — is it always the bladder?
Not necessarily. If a single cell is soft while the others are firm, that's a bladder. If the entire mattress won't hold pressure, the problem is more likely the pump, a kinked or disconnected main supply tube, or a leak at a connector. Check the easy stuff — is the pump running, are the hoses seated — before you assume it's a cell.
A soft cell isn't the end of a good mattress. It's a 15-minute fix and an inexpensive part. Keep the right replacement bladder on hand and you can have the mattress back to doing its job before the pump has a chance to complain about it.
— The HME Parts Team