
Quick answer: To replace the rear wheel on a Drive Nitro rollator, lock the wheel, pry off the hub cap with a small flathead screwdriver, remove the locknut with a 13mm socket, release the loop brake, and slide the wheel off. Reverse the steps to install the new wheel. The job takes about five minutes and requires only a flathead screwdriver and a 13mm socket — no repair shop needed.
If you've ever tried to find a replacement part for a walker at 9pm on a Tuesday because the wheel just… stopped rolling, welcome to the club. I've been there more times than I'd like to admit, usually crouched on someone's kitchen floor with a flashlight in my teeth, wondering why nobody puts the axle size on the outside of the box.
The good news: swapping a rear wheel on a Drive Nitro rollator is one of those repairs that looks intimidating in the manual and takes about five minutes once you've actually got your hands on it. No special tools beyond a small flathead screwdriver and a 13mm socket. No trip to a repair shop. Just four steps, and I'll walk you through every one of them with the actual photos from Drive's own instructions — plus the stuff they don't tell you.
What You'll Need
- A small flathead screwdriver
- A 13mm socket wrench
- Your replacement Drive Nitro rear wheel
- About five minutes and a flat surface to work on
Step 1: Lock the Wheel
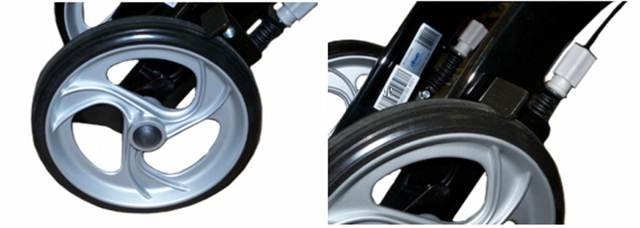
Engage the wheel lock on the Drive Nitro rollator before removing anything. The Nitro's brake system holds tension on the frame during this repair, so locking the wheel first keeps the frame from shifting while you're working near the axle with a screwdriver.
Step 2: Pry Off the Hub Cap
Use a small flathead screwdriver to pop off the hub cap in the center of the wheel. The cap is held on by friction, not screws, so work the screwdriver tip gradually around the edge rather than prying hard in one spot — that's what scars up the cap or the wheel.

Pro tip: Set the hub cap somewhere you won't lose it. I say this as someone who has personally donated at least four hub caps to the carpet gods.
Step 3: Remove the Locknut with a 13mm Socket
Underneath the hub cap is a locknut holding the wheel to the axle. Remove it with a 13mm socket wrench. It will feel snug when you first turn it — that's normal, not a sign of damage.

Step 4: Release the Loop Brake and Slide the Wheel Off
Release tension on the loop brake cable, which runs directly past the axle, before pulling the wheel free. Skipping this step means fighting the cable the whole way. Once the cable tension is released, the wheel slides off the axle.

To install the new wheel, reverse steps 1 through 4: lock the wheel, slide the new wheel onto the axle, reconnect the brake cable tension, thread the locknut back on with the 13mm socket, and snap the hub cap back into place.
Real talk: the hardest part of this whole job isn't the mechanics, it's remembering which side the brake cable sits on when you're putting it back together. Take a quick photo with your phone before you start pulling anything apart — five seconds now saves you ten minutes of squinting later.
Frequently Asked Questions
What tools do I need to replace a Nitro rollator rear wheel?
You need only a small flathead screwdriver and a 13mm socket wrench. No specialty tools are required.
How long does it take to replace the rear wheel on a Drive Nitro rollator?
Replacing the rear wheel typically takes about five minutes once you have the tools and replacement wheel on hand.
Do I need to remove the brake cable to change the wheel?
You don't need to fully remove the loop brake cable, but you do need to release its tension before the wheel will slide off the axle.
Can I install the new wheel myself, or do I need a repair shop?
This is a self-service repair. Reversing the four removal steps — lock, slide on the new wheel, reconnect the brake, replace the locknut and hub cap — installs the new wheel without a repair shop visit.
Wrapping Up
That's it. Four steps, two tools, and a wheel that rolls again instead of dragging like it's filing a complaint. If your Nitro's rear wheel is worn down, cracked, or just tired of holding on, we carry the replacement wheel and the rest of the Nitro parts catalog over at HME Medical Shop — no guessing which axle size you need, it's all laid out by model.
And if you get partway through and the hub cap goes flying under the couch anyway — don't worry about it, you're in good company.
— The HME Parts Team